Introduction 00:00
Another technique I get questions about, is how to slice a model like I did for the Citrix & Redbull website (the SSL certificate is broken and you need to scroll down once to see the slicing effect in action):

This effect is actually quite simple and involves concepts that we’ve already tackled, like how to enhance a built-in material, how to not display fragments and some trigonometry:
Setup 01:29
The starter already contains the following:
- A IcosahedronGeometry with a MeshStandardMaterial applied to it
- A plane to test the shadow
- An HDR environment map for the background but also to light up the scene
- A DirectionalLight to light up the sphere even more and cast a shadow on the plane
- The
vite-plugin-glsldependency to handle GLSL files - A
GLTFLoaderinstance with aDracoLoaderinstance associated with it - A gears model as
gears.glbin thestatic/folder OrbitControlsto rotate around- The
three-custom-shader-materialdependency to enhance built-in materials
Model 02:29
The lesson could have started with the model already implemented, but it’s a good opportunity to practice.
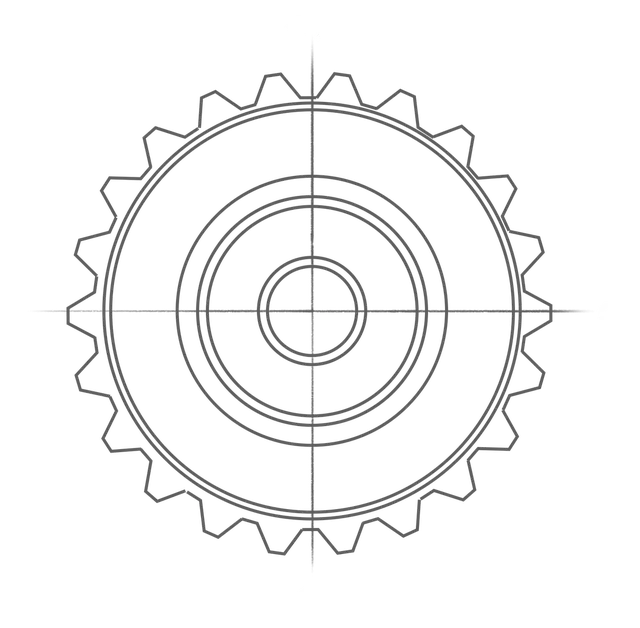
The gears model has been created in Blender and you can download the file using the Resources button:

If you open that file, you’ll see that it’s made up of 3 parts: the axle, the outerHull and the gears.
The slicing effect must be applied only to the outerHull so that it reveals the gears inside.
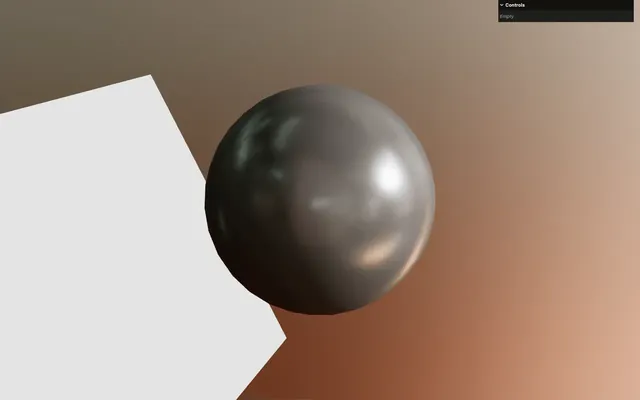
Since the sphere is a placeholder for the actual model, let’s remove the IcosahedronGeometry and the Mesh, but keep the material:
/**
 * Sliced model
 */
// Material
const material = new THREE.MeshStandardMaterial({
    metalness: 0.5,
    roughness: 0.25,
    envMapIntensity: 0.5,
    color: '#858080'
})

Load
The model is located in static/gears.glb. We already have an instance of GLTFLoader and an instance of DRACOLoader associated with it.
Use the load() method on the GLTFLoader instance, set the path to './gears.glb' and add a gltf parameter to the callback function:
// Model
gltfLoader.load('./gears.glb', (gltf) =>
{
})
Add the gltf.scene to your scene:
// Model
gltfLoader.load('./gears.glb', (gltf) =>
{
    scene.add(gltf.scene)
})

Rotation
We are going to make the model execute a perpetual rotation so that we can enjoy it from different angles and lighting.
Since we want to rotate gltf.scene on each frame, we need to do it in the tick function, but we don’t have access to gltf.scene outside of the callback function.
It’s a classic scope issue.
To fix that, before the load(), create a model variable using a let, to which you assign null:
let model = null
gltfLoader.load('./gears.glb', (gltf) =>
{
    // ...
})
In the callback, assign gltf.scene to model:
let model = null
gltfLoader.load('./gears.glb', (gltf) =>
{
    model = gltf.scene
    scene.add(model)
})
We now have access to model from anywhere.
In the tick function, assign elapsedTime multiplied by 0.1 to model.rotation.y:
const tick = () =>
{
    const elapsedTime = clock.getElapsedTime()

    // Update model
    model.rotation.y = elapsedTime * 0.1

    // ...
}
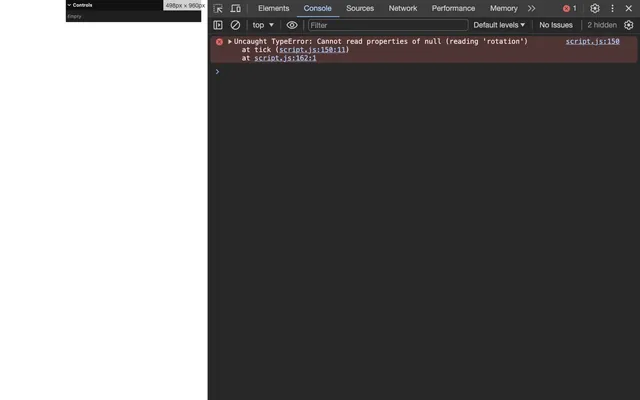
We get an error, because it takes time to load the model and the model variable will be null for a few frames.
Wrap the model rotation in an if statement so that we don’t update it while it’s null:
const tick = () =>
{
    const elapsedTime = clock.getElapsedTime()

    // Update model
    if(model)
        model.rotation.y = elapsedTime * 0.1

    // ...
}
Material
The model currently has a white MeshStandardMaterial applied to it because it’s the default one Three.js applies when loading a model without material.
We still have our own MeshStandardMaterial in the material variable and we want to apply it to the model.
To make sure that it’s applied to every Mesh of the model, we’re going to traverse it.
In the callback function, traverse the model using the traverse() method on model:
gltfLoader.load('./gears.glb', (gltf) =>
{
    model = gltf.scene

    model.traverse((child) =>
    {

    })

    scene.add(model)
})
The function will be called on each child and grandchild of the model.
In that function, test if the child is a Mesh using the isMesh property:
gltfLoader.load('./gears.glb', (gltf) =>
{
    model = gltf.scene

    model.traverse((child) =>
    {
        if(child.isMesh)
        {

        }
    })

    scene.add(model)
})
In that if(child.isMesh), assign the material to the child.material property:
gltfLoader.load('./gears.glb', (gltf) =>
{
    model = gltf.scene

    model.traverse((child) =>
    {
        if(child.isMesh)
        {
            child.material = material
        }
    })

    scene.add(model)
})

Shadows
We are going to activate both casting and receiving of the shadow on every Mesh of the model.
Still in the if(child.isMesh), set the castShadow and receiveShadow to true:
gltfLoader.load('./gears.glb', (gltf) =>
{
    model = gltf.scene

    model.traverse((child) =>
    {
        if(child.isMesh)
        {
            child.material = material
            child.castShadow = true
            child.receiveShadow = true
        }
    })

    scene.add(model)
})

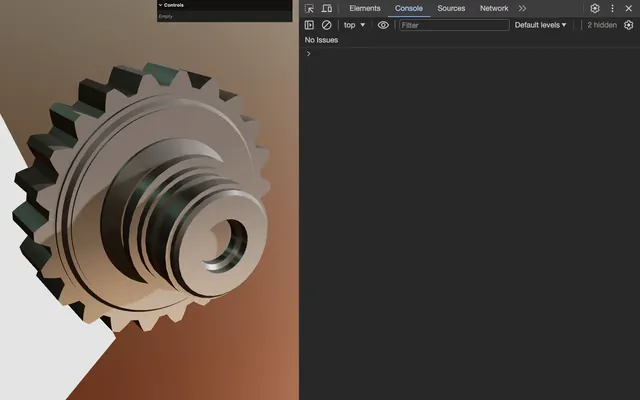
Custom material 10:51
We have our model ready, so let’s apply our material to it.
We now want to replace the MeshStandardMaterial with an improved version which supports the slicing effect. To improve MeshStandardMaterial, we are going to use Custom Shader Material which is already available in the dependencies.
Instantiate
Import CustomShaderMaterial from 'three-custom-shader-material/vanilla':
import CustomShaderMaterial from 'three-custom-shader-material/vanilla'Since we want to apply the slicing only on the Mesh named outerHull, we are going to keep the default material for the other elements of the model.
Duplicate material and name it slicedMaterial:
const slicedMaterial = new THREE.MeshStandardMaterial({
    metalness: 0.5,
    roughness: 0.25,
    envMapIntensity: 0.5,
    color: '#858080'
})
Replace THREE.MeshStandardMaterial with CustomShaderMaterial (don’t save):
const slicedMaterial = new CustomShaderMaterial({
    metalness: 0.5,
    roughness: 0.25,
    envMapIntensity: 0.5,
    color: '#858080'
})
Set the baseMaterial property to THREE.MeshStandardMaterial so that the material inherits from MeshStandardMaterial. Then separate the properties using comments (you can save):
const slicedMaterial = new CustomShaderMaterial({
    // CSM
    baseMaterial: THREE.MeshStandardMaterial,

    // MeshStandardMaterial
    metalness: 0.5,
    roughness: 0.25,
    envMapIntensity: 0.5,
    color: '#858080'
})
We get a warning about Custom Shader Material dealing with unexpected pieces of code:
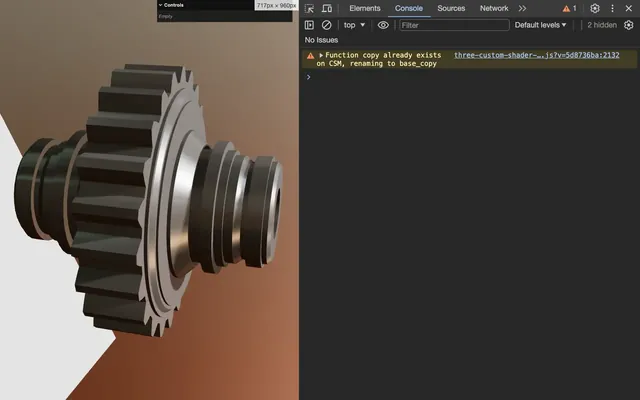
We can ignore those warnings by adding the silent property to true:
const slicedMaterial = new CustomShaderMaterial({
    // CSM
    baseMaterial: THREE.MeshStandardMaterial,
    silent: true,

    // ...
})
Shaders
We are going to need both a vertex and a fragment shader.
In src/, create a shaders/ folder. In that src/shaders/ folder, create a sliced/ folder.
In that src/shaders/sliced/ folder, create a vertex.glsl with an empty void main() function:
void main()
{
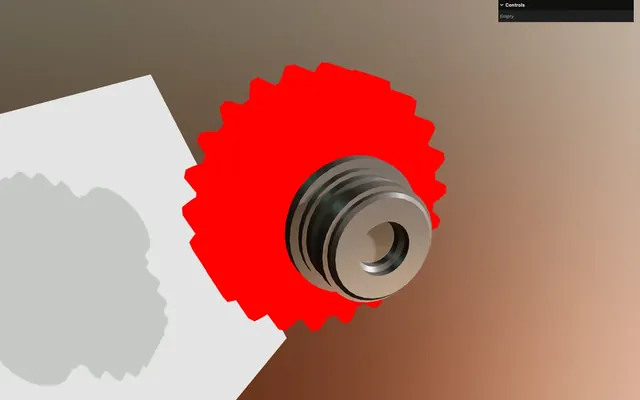
}In that src/shaders/sliced/ folder, create a fragment.glsl with a void main() function. Next, to test if the shader is working, set the csm_FragColor to vec4(1.0, 0.0, 0.0, 1.0):
void main()
{
    csm_FragColor = vec4(1.0, 0.0, 0.0, 1.0);
}
Once implemented, the csm_FragColor should override gl_FragColor, making the Mesh look red.
In script.js, import both shaders as slicedVertexShader and slicedFragmentShader:
import slicedVertexShader from './shaders/sliced/vertex.glsl'
import slicedFragmentShader from './shaders/sliced/fragment.glsl'
Add them to the CustomShaderMaterial instance using the vertexShader and fragmentShader properties:
const slicedMaterial = new CustomShaderMaterial({
    // CSM
    baseMaterial: THREE.MeshStandardMaterial,
    vertexShader: slicedVertexShader,
    fragmentShader: slicedFragmentShader,
    silent: true,

    // ...
})
Apply
Our material should be ready and, hopefully, we haven’t made any mistakes.
Time to add slicedMaterial to our model but only to the element named outerHull.
To do that, in the if(child.isMesh), use another if to test if the child.name is 'outerHull'. If so, apply the slicedMaterial, otherwise, apply the material:
gltfLoader.load('./gears.glb', (gltf) =>
{
    // ...

    model.traverse((child) =>
    {
        if(child.isMesh)
        {
            if(child.name === 'outerHull')
            {
                child.material = slicedMaterial
            }
            else
            {
                child.material = material
            }

            child.castShadow = true
            child.receiveShadow = true
        }
    })

    // ...
})
Slice 17:26
We now have a custom material applied to the outerHull, time to slice it. To do so, we are going to use the discard; that we saw in previous lessons.
Fragment position
The discard; can only be called in the fragment shader, but since we want to discard; according to the position, we need to send the position from the vertex to the fragment.
In vertex.glsl, create a vec3 vPosition varying, to which you assign the csm_Position.xyz:
varying vec3 vPosition;
void main()
{
vPosition = csm_Position.xyz;
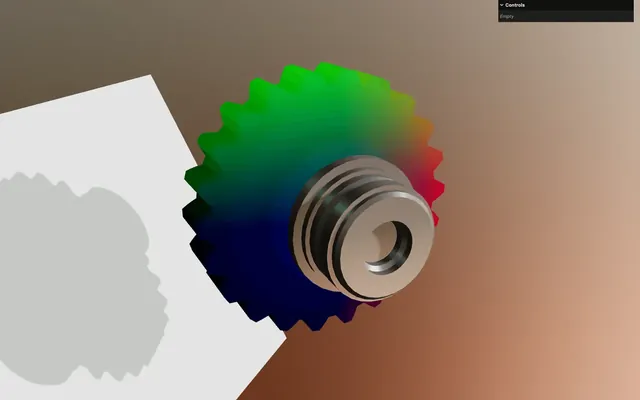
}In fragment.glsl, retrieve the vPosition varying. Out of curiosity, assign it to the first three values of csm_FragColor:
varying vec3 vPosition;

void main()
{
    csm_FragColor = vec4(vPosition, 1.0);
}
Radial slicing
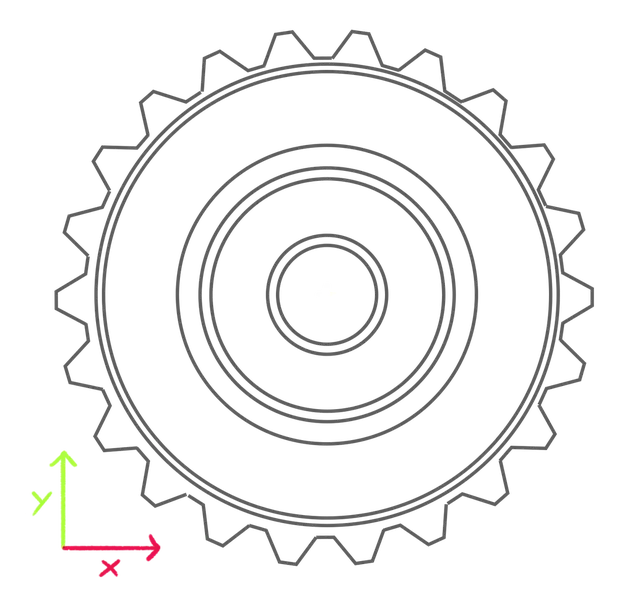
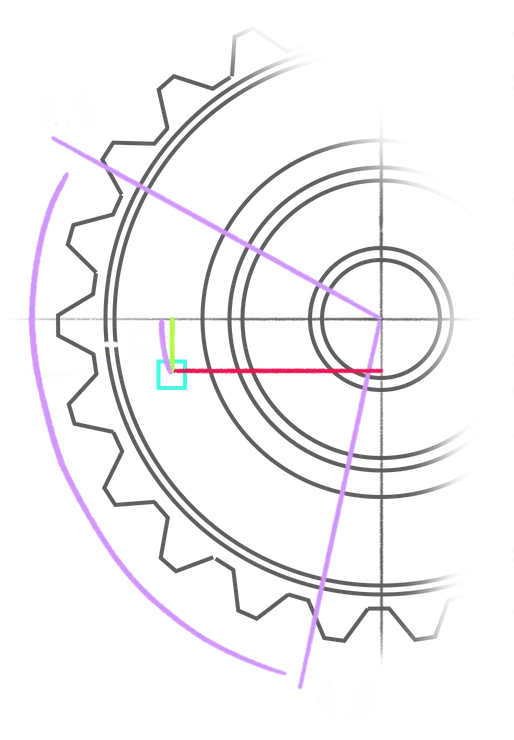
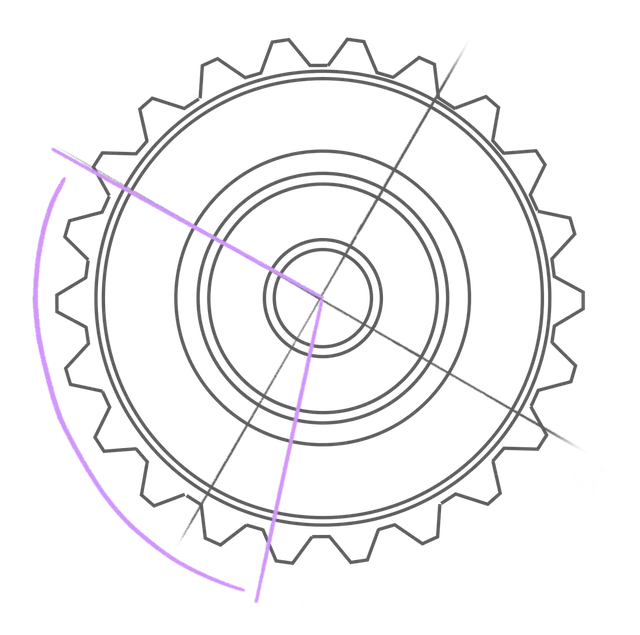
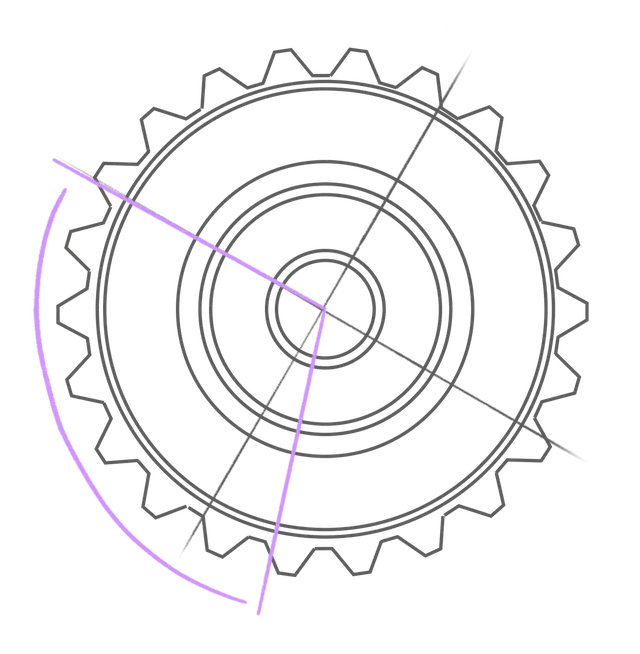
We want to slice according to the radial coordinates.
It’s like removing a slice of a cake and since the model is aligned with the z-axis, we can focus on the x and y axes with some trigonometry:
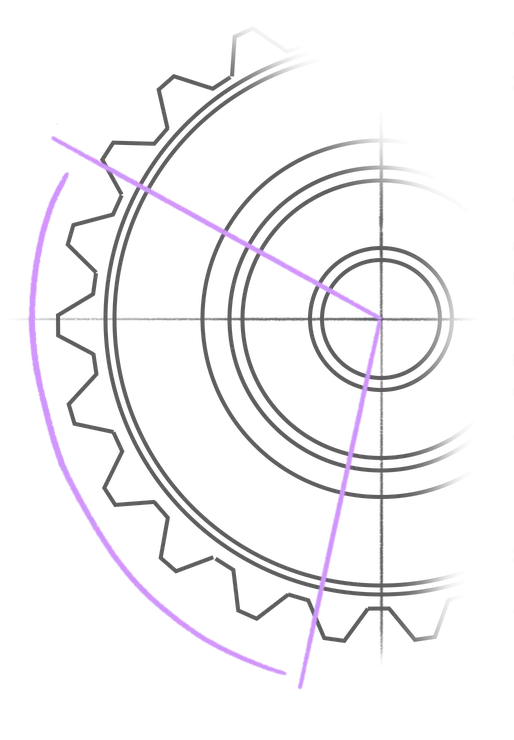
We are going to use a start angle and an amplitude angle that we call “arc”:
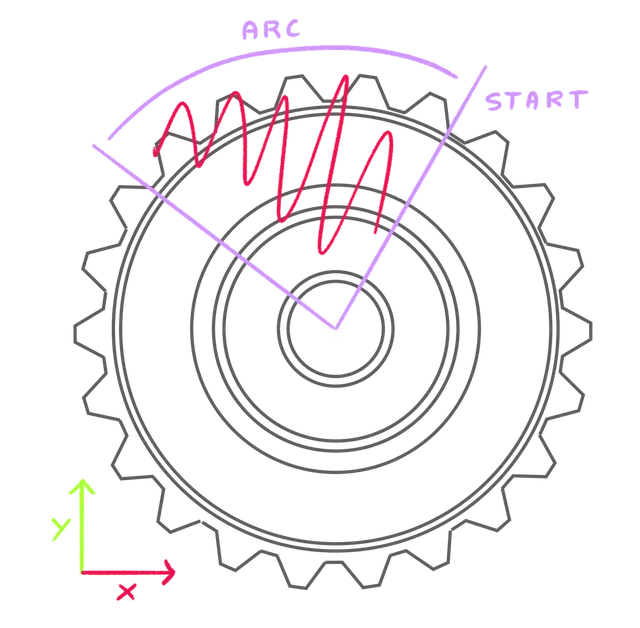
For now, we are going to create those as variables named uSliceStart and uSliceArc, but later we are going to use uniforms.
Create a float uSliceStart to 1.0 and a float uSliceArc to 1.5:
void main()
{
    float uSliceStart = 1.0;
    float uSliceArc = 1.5;

    // ...
}
Now that we have angle variables indicating where the fragment should be discard;, we need the current angle of the fragment being drawn.
As mentioned earlier, we can focus on the x and y axes. In trigonometry, to calculate an angle from 2D coordinates, we can use the “arc tangent” and we have a function for this in GLSL named atan.
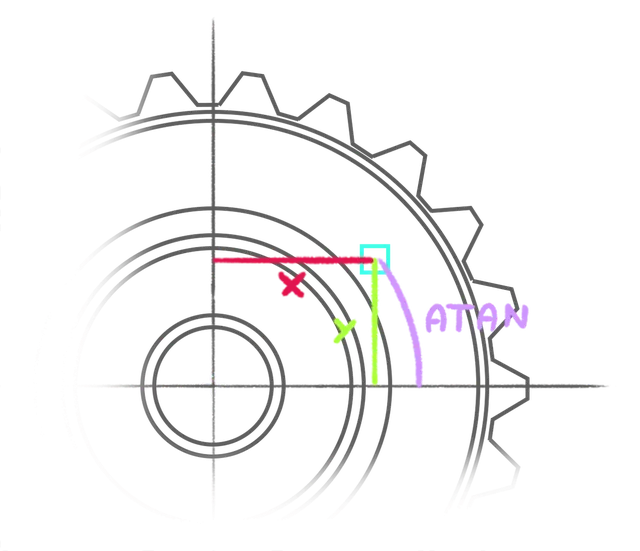
Create a float angle variable, to which you assign the result of atan. Then, send the vPosition.y and vPosition.x in that order (y first and then x) to that atan.
void main()
{
    // ...

    float angle = atan(vPosition.y, vPosition.x);

    // ...
}
Send that angle to the first three values of csm_FragColor as a vec3 to see what we get:
void main()
{
    // ...

    float angle = atan(vPosition.y, vPosition.x);

    csm_FragColor = vec4(vec3(angle), 1.0);
}

The value seems positive on the top side and negative on the bottom side.
This corresponds to what we can expect from the arc tangent where values range from 0 to PI on the top part and 0 to -PI on the bottom part:
We can now compare uSliceStart, uSliceArc and angle.
If angle is more than uSliceStart and angle is also less than uSliceStart + uSliceArc, it means angle is in the sliced area and we can call discard;:
if(angle > uSliceStart && angle < uSliceStart + uSliceArc)
        discard;

That’s a start.
Uniforms
Right, time to transform uSliceStart and uSliceArc into uniforms so that we can tweak them.
If you remember from the previous lessons, we are going to have a shadow issue which will require us to provide a custom MeshDepthMaterial. We will do that later, but this indicates that we are going to need to provide the uniforms to two materials, which is why we are going to create those uniforms once and use them on both materials.
In script.js, before the materials, create a uniforms object and set the uSliceStart to 1.75 and the uSliceArc to 1.25 using the Uniform class:
// Material
const uniforms = {
    uSliceStart: new THREE.Uniform(1.75),
    uSliceArc: new THREE.Uniform(1.25),
}

const material = new THREE.MeshStandardMaterial({
    // ...
})

const slicedMaterial = new CustomShaderMaterial({
    // ...
})
Right after setting the uniforms object, create the corresponding tweaks:
const uniforms = {
    // ...
}

gui.add(uniforms.uSliceStart, 'value', - Math.PI, Math.PI, 0.001).name('uSliceStart')
gui.add(uniforms.uSliceArc, 'value', 0, Math.PI * 2, 0.001).name('uSliceArc')
The uSliceStart ranges from -PI to +PI so that it matches the angle we get from the arc tangent.
The uSliceArc ranges from 0 to 2 * PI so that we can slice from nothing to the whole cake.
Send the uniforms object to the uniforms property of the CustomShaderMaterial:
const slicedMaterial = new CustomShaderMaterial({
    // CSM
    baseMaterial: THREE.MeshStandardMaterial,
    vertexShader: slicedVertexShader,
    fragmentShader: slicedFragmentShader,
    uniforms: uniforms,
    silent: true,

    // ...
})
In fragment.glsl, retrieve the uSliceStart and uSliceArc uniforms as float, and delete the temporary variables:
uniform float uSliceStart;
uniform float uSliceArc;

varying vec3 vPosition;

void main()
{
    float angle = atan(vPosition.y, vPosition.x);

    if(angle > uSliceStart && angle < uSliceStart + uSliceArc)
        discard;

    csm_FragColor = vec4(vec3(angle), 1.0);
}
Fix the angle
It’s working. Unfortunately, for some specific values, the slicing is broken:
Here’s an example of the problem.
If we set the uSliceStart to 2.5 and the uSliceArc to 2, it means that the slicing angle will go from 2 to 4.5 (because uSliceStart + uSliceArc):
But if we take the following fragment with a position of x = -1 and y = -0.2, its angle will be around -3:
And since -3 isn’t between 2.5 and 4.5, the if statement is false and the fragment won’t be discard;.
There are multiple ways of handling this problem, but the one I like to use is by transforming the base coordinates. In our case, we are going to rotate the angle so that its 0 is where the slicing should start:
This is something we can do in the fragment.glsl by subtracting uSliceStart to angle:
void main()
{
    float angle = atan(vPosition.y, vPosition.x);
    angle -= uSliceStart;

    // ...
}
Now that we‘ve already applied the uSliceStart to the angle, we can remove it from the if statement:
void main()
{
    float angle = atan(vPosition.y, vPosition.x);
    angle -= uSliceStart;

    if(angle > 0.0 && angle < uSliceArc)
        discard;

    // ...
}
We get the same result, but here comes the trick. We can apply a modulo 2 * PI to angle.
Until now, we have been using modulo so that, when a variable reaches a threshold, it gets back to 0. But in the case of GLSL, modulo also makes negative values loop from 0 to whatever threshold we choose.
For example, modulo of -0.25 with a threshold of 1.0 will result in 0.75. It’s weird, it’s specific to GLSL, but it helps us in this situation by making the negative part of the arc tangent loop continuously with the positive value:
We are going to need the a PI approximation in the fragment shader. If you remember from the Shader Patterns lesson, we created a PI variable using the following syntax:
#define PI 3.1415926535897932384626433832795Defines are cheaper than variables but cannot be changed. It is good practice to write defines in UPPERCASE to distinguish them from other variables.
We did this because we were using a RawShaderMaterial. But right now, we are enhancing Three.js built-in shaders, and Three.js already created that PI variable for us.
You can find it in the common chunk which is used in almost every built-in materials: common.glsl.js
This means that we can use PI in our fragment shader without having to create it ourselves.
Apply a modulo 2.0 * PI on angle using the mod function:
void main()
{
    float angle = atan(vPosition.y, vPosition.x);
    angle -= uSliceStart;
    angle = mod(angle, PI * 2.0);

    // ...
}
This part is more of a trick that I end up using after messing up the values. It’s okay if you don’t understand it.
Also, remember that using modulo on negative numbers can display different behaviour according to the environment. As an example, -0.25 % 1 in JavaScript will output -0.25 and not 0.75 like in GLSL.
Remove the csm_FragColor:
void main()
{
float angle = atan(vPosition.y, vPosition.x);
angle -= uSliceStart;
angle = mod(angle, PI * 2.0);
if(angle > 0.0 && angle < uSliceArc)
discard;
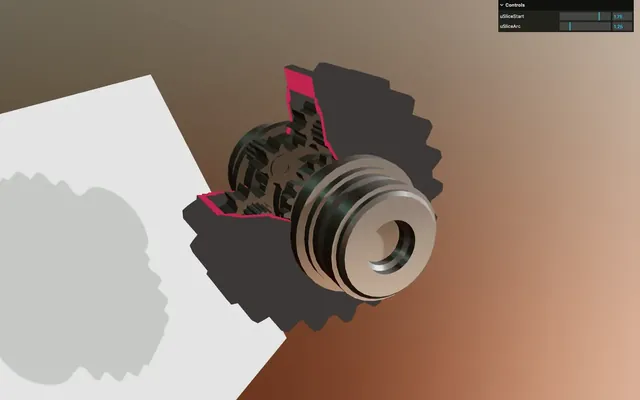
}Fill the gap 48:09
We’ve managed avoid drawing fragments for the slice part, but the inside of the slice doesn’t look good.
Ideally, we would like to have a nice surface that would act like the rest of the material with reflection, shading, shadows, etc. Unfortunately, it’s near impossible without reconstructing an actual geometry there.
While constructing the geometry is possible in real-time, the performance is bad, especially for complex geometries. For a one-shot slice, it’s fine, but if you want to tweak or animate the slicing in real-time, you would need to reconstruct the geometry for each frame, thus drastically reducing the frame rate.
Instead, we are going to draw a uniform color to highlight the slicing on purpose as we did on the Citrix & Redbull website:

And we are going to do that by displaying a uniform color only if it’s the backside of the geometry, overriding the default shading of MeshStandardMaterial.
First, we need to display the backside.
On the CustomShaderMaterial instance, set the side property to THREE.DoubleSide:
const slicedMaterial = new CustomShaderMaterial({
    // ...
    side: THREE.DoubleSide
})

As seen in the Hologram lesson, in GLSL, we have access to a variable named gl_FrontFacing which is a boolean being true if the fragment we are drawing is facing the camera (front side) and false otherwise (back side).
In fragment.glsl, use an if statement to test if it’s the backside by preceding gl_FrontFacing with a ! . Then, set the csm_FragColor to the following vec4:
void main()
{
    // ...

    if(!gl_FrontFacing)
        csm_FragColor = vec4(0.75, 0.15, 0.3, 1.0);
}
The backside is now red, indicating that it’s working, but the rest of the material is also a uniform color. Weird.
This is a Custom Shader Material limitation. The only fact of having csm_FragColor in our custom shader makes the gl_FragColor of the final shader being overridden by csm_FragColor and the default csm_FragColor is the color we send to the material, which is why it’s gray.
Unfortunately, we can’t fix that from the fragment.glsl and we are going to have to inject our own shader which is the perfect opportunity to discover how we do that when using Custom Shader Material.
First, remove the if and csm_FragColor from fragment.glsl:
void main()
{
    float angle = atan(vPosition.y, vPosition.x);
    angle -= uSliceStart;
    angle = mod(angle, PI * 2.0);

    if(angle > 0.0 && angle < uSliceArc)
        discard;
}

To inject our own shader chunks into a CustomShaderMaterial instance, we need to use the patchMap property.
But since we are going to do that for the slicedMaterial and for the upcoming custom depth material, we are going to create the patchMap once and use it on both materials (like for the uniforms).
Before the materials, create a patchMap variable, to which you assign an empty object:
const patchMap = {}

const material = new THREE.MeshStandardMaterial({
    // ...
})

const slicedMaterial = new CustomShaderMaterial({
    // ...
})
The way patchMap works is that the property we put in it will be the name we choose for the patch. Using that name in the shader will inject whatever patches we input as the value.
Let’s choose csm_Slice and assign an object to it:
const patchMap = {
    csm_Slice:
    {

    }
}
One patch can execute multiple replacements. Replacements work like what we did in the Modified Material lesson. We choose a piece of code we want to replace from the Three.js built-in shader and replace it with another piece of code.
In our case, we want to replace the part of the MeshStandardMaterial that handles the gl_FragColor and it looks like this: #include <colorspace_fragment>.
You can find it on the Three.js code: https://github.com/mrdoob/three.js/blob/dev/src/renderers/shaders/ShaderLib/meshphysical.glsl.js#L218
Inside csm_Slice, the property corresponds to the piece of code we want to replace and the value corresponds to the piece of code replacing it.
This structure makes it possible to have multiple parts to replace. In our case, we only have one part to replace and it’s #include <colorspace_fragment>.
To start with, we want to replace it with the same thing:
const patchMap = {
    csm_Slice:
    {
        '#include <colorspace_fragment>': '#include <colorspace_fragment>'
    }
}
Now, we can add our own code to the value.
Writing code here is going to be silly and impossible to maintain. Fortunately, we can use the template literal syntax with back quotes, allowing line breaks:
const patchMap = {
    csm_Slice:
    {
        '#include <colorspace_fragment>':
        `
            #include <colorspace_fragment>
        `
    }
}
In there, after the #include <colorspace_fragment>, we can use the same code as we did earlier with gl_FrontFacing but this time we update the gl_FragColor directly:
const patchMap = {
    csm_Slice:
    {
        '#include <colorspace_fragment>':
        `
            #include <colorspace_fragment>

            if(!gl_FrontFacing)
                gl_FragColor = vec4(0.75, 0.15, 0.3, 1.0);
        `
    }
}
Since the code is quite simple, we are going to keep it in the JavaScript using template literal, but feel free to put it in a separated GLSL file.
To enable the patches for the material, add patchMap to the patchMap property of CustomShaderMaterial:
const slicedMaterial = new CustomShaderMaterial({
    // CSM
    baseMaterial: THREE.MeshStandardMaterial,
    vertexShader: slicedVertexShader,
    fragmentShader: slicedFragmentShader,
    uniforms: uniforms,
    patchMap: patchMap,
    // ...
})
And to activate it, create an empty float variable named like the patch you want to activate, anywhere in the shader:
void main()
{
    // ...

    float csm_Slice;
}

This part is a little bit silly. In fact, besides a float, we can also vec2 or a vec3, or whatever. At any rate, it’s a way of alerting Custom Shader Material that we want to apply the patches without breaking the GLSL syntax.
Fix the shadow 01:00:51
We are almost done, but the shadow is not being sliced. We can see that on the plane, but also on the small gears that seem to be in the shade.
Instantiate
Like in the previous lesson, we need to provide a custom depth material.
Duplicate the slicedMaterial and name it slicedDepthMaterial:
const slicedMaterial = new CustomShaderMaterial({
    // ...
})

const slicedDepthMaterial = new CustomShaderMaterial({
    // ...
})
Change the baseMaterial to THREE.MeshDepthMaterial:
const slicedDepthMaterial = new CustomShaderMaterial({
    // CSM
    baseMaterial: THREE.MeshDepthMaterial,
    // ...
})
Remove the properties associated with MeshStandardMaterial and add the only property associated with MeshDepthMaterial that we need, which is depthPacking to THREE.RGBADepthPacking:
const slicedDepthMaterial = new CustomShaderMaterial({
    // CSM
    baseMaterial: THREE.MeshDepthMaterial,
    vertexShader: slicedVertexShader,
    fragmentShader: slicedFragmentShader,
    uniforms: uniforms,
    patchMap: patchMap,
    silent: true,

    // MeshDepthMaterial
    depthPacking: THREE.RGBADepthPacking
})
Apply
Our depth material is ready.
Where we test if the child.name equals 'outerHull', in addition to applying the slicedMaterial to the material property, apply the slicedDepthMaterial to the customDepthMaterial property:
gltfLoader.load('./gears.glb', (gltf) =>
{
    // ...

    model.traverse((child) =>
    {
        if(child.isMesh)
        {
            if(child.name === 'outerHull')
            {
                child.material = slicedMaterial
                child.customDepthMaterial = slicedDepthMaterial
            }
            // ...
        }
    })

    // ...
})
And that’s it. Since we use the same uniforms and patchMap, the slicing now works on the depth material, thus updating the shadow properly.
Going further 01:02:37
Yes. That’s a wrap for this effect.
As always, feel free to go further. Here are some suggestions:
- Add a uniform to control the color
- Animate the slicing on whatever user interaction
- Test with your own model
- Create a more fancy reveal than a radial slicing. Why don’t you try using the Simplex Noise?